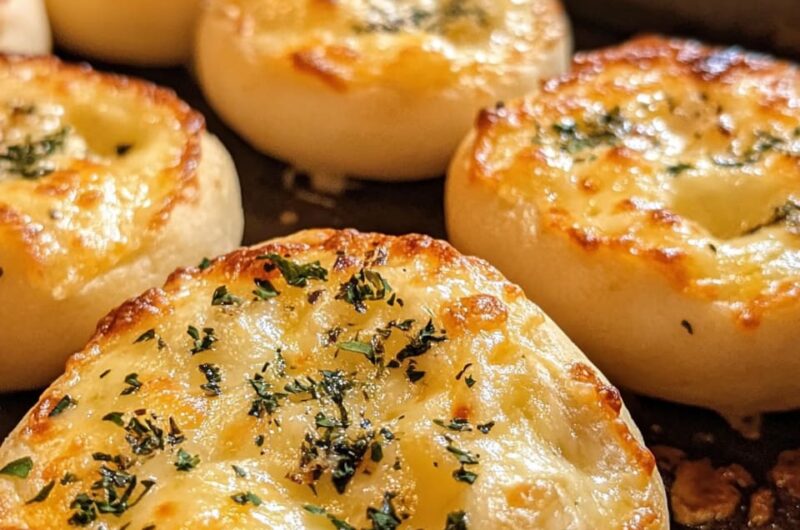
Cheesy Garlic Butter Bombs are a delightful treat that will take your taste buds on an amazing journey. These little bursts of flavor pack a punch, combining the richness of cheese, the buttery goodness of garlic, and the perfect touch of herbs. When baked to perfection, each bite reveals a gooey center that is simply irresistible. Whether you’re hosting a gathering or just craving a snack, these cheesy bombs will bring joy to your table.
Imagine the aroma filling your kitchen as these delightful morsels cook. It’s not only about taste; it’s a sensory experience that creates anticipation and excitement. You’ll find that these cheesy garlic butter bombs are an easy way to impress your friends and family without spending hours in the kitchen. This recipe, known for its simplicity and rich flavors, is perfect for cooks of all skill levels.
In this article, you will discover why this recipe is a must-try, the preparation and cooking time, a detailed list of ingredients, easy-to-follow steps for making these delicious bites, and tips on how to serve them for maximum enjoyment. Prepare to indulge in a culinary adventure as we delve deeper into the wonderful world of Cheesy Garlic Butter Bombs!
Why You’ll Love This Recipe
Cheesy Garlic Butter Bombs bring together flavors that create an uplifting experience. Each aspect— from preparation to final bite—ensures that you’ll fall in love with this dish. Here’s why you’ll rave about this recipe:
1. Flavor Explosion: The combination of garlic, butter, and cheese creates a remarkable burst of flavor in every bite.
2. Quick and Easy: With minimal ingredients and straightforward instructions, you can whip these up in no time.
3. Ideal for Any Occasion: Perfect as an appetizer, snack, or even a side dish to complement your favorite meal.
4. Family-Friendly: Kids and adults alike will love these cheesy treats, making them a hit at family gatherings.
5. Customizable: You can easily adapt the ingredients to cater to your preferences or dietary needs, including adding herbs or spices.
6. Visually Appealing: Their golden-brown exterior is sure to impress your guests and create a beautiful presentation.
With these enticing elements observed, it’s easy to see why Cheesy Garlic Butter Bombs have earned a place in many hearts. Each bite evokes feelings of warmth and satisfaction, inviting you back for more!
Preparation and Cooking Time
Making Cheesy Garlic Butter Bombs is quick and enjoyable. Here’s a breakdown of the total time required for preparation and cooking:
– Preparation Time: 15 minutes
– Cooking Time: 15-20 minutes
– Total Time: Approximately 30-35 minutes
This fast turnaround time makes it accessible for a busy weekday or for those spontaneous moments when guests drop by unexpectedly.
Ingredients
– 1 can refrigerated biscuit dough (8 biscuits)
– ½ cup shredded mozzarella cheese
– ½ cup cheddar cheese, shredded
– ¼ cup unsalted butter, melted
– 3 garlic cloves, minced
– 1 teaspoon dried parsley (or fresh if preferred)
– ½ teaspoon salt
– ½ teaspoon black pepper
Step-by-Step Instructions
Creating Cheesy Garlic Butter Bombs is a breeze if you follow these simple steps:
1. Preheat Oven: Preheat your oven to 375°F (190°C). This ensures the biscuits cook evenly.
2. Prepare Baking Sheet: Line a baking sheet with parchment paper for easier cleanup.
3. Mix Cheeses: In a bowl, combine the mozzarella and cheddar cheese. Set aside.
4. Prepare Biscuits: Open the can of biscuit dough and separate the biscuits.
5. Fill Biscuits: Flatten each biscuit slightly in your hand. Place a spoonful of the cheese mixture in the center.
6. Seal the Biscuits: Fold the biscuit over the cheese and pinch the edges together to seal it. Ensure no cheese is visible from the outside.
7. Prepare Garlic Butter: In a separate bowl, mix the melted butter, minced garlic, parsley, salt, and black pepper.
8. Coat the Bombs: Dip each sealed biscuit into the garlic butter mixture, ensuring it’s well-coated.
9. Arrange on Baking Sheet: Place the coated biscuit bombs on the prepped baking sheet, spaced apart for even baking.
10. Add More Garlic Butter: Drizzle any remaining garlic butter over the top of the biscuits for extra flavor.
11. Bake: Place in the preheated oven and bake for 15-20 minutes or until golden brown.
12. Cool Slightly: Once out of the oven, let them cool for a few minutes before serving.
These steps guide you through crafting these delightful bites easily, making them perfect for any occasion.
How to Serve
When it comes to serving Cheesy Garlic Butter Bombs, consider the following tips to create the ultimate experience:
1. Presentation Plate: Use a nice serving platter to showcase the bomb’s golden appearance. This adds a touch of elegance to your meal.
2. Dipping Sauces: Pair them with marinara sauce, ranch dressing, or garlic butter for an added flavor dimension.
3. Garnish: Sprinkle freshly chopped herbs like parsley or cilantro on top for a splash of color and flavor.
4. Serving Size: These bites are best enjoyed fresh out of the oven. Keep the servings manageable, allowing guests to enjoy more than one without feeling too full.
5. Drink Pairings: Consider offering sparkling water, wine, or a refreshing iced tea to complement these savory delights.
By using these serving strategies, you can ensure that your Cheesy Garlic Butter Bombs will be a hit at any gathering or casual dinner at home. Enjoy this incredible culinary creation that is bound to wow everyone at the table!
Additional Tips
– Use Fresh Ingredients: For the best flavor in your Cheesy Garlic Butter Bombs, opt for fresh garlic and quality cheeses. Freshness enhances the taste significantly.
– Experiment with Herbs: Feel free to experiment with different herbs. Basil, oregano, or thyme can add a nice twist to the flavor profile.
– Don’t Overfill: Make sure not to overfill the biscuits with cheese. This will help them seal properly and avoid spillage during baking.
– Allow to Cool Slightly: Let the bombs cool for a few minutes after baking. They’ll be easier to handle, and you’ll avoid burning your mouth on the gooey cheese.
Recipe Variation
Customizing your Cheesy Garlic Butter Bombs can be a fun cooking experiment! Here are some delightful variations to try:
1. Add Meat: Incorporate cooked bacon or pepperoni inside the cheese filling for a meaty flavor.
2. Spicy Option: Mix in some minced jalapeños or red pepper flakes with the cheese for an extra kick.
3. Sweet Potato: For a twist on texture and flavor, add mashed sweet potatoes to the cheese filling.
4. Veggie Bombs: Add sautéed vegetables like spinach, mushrooms, or bell peppers for a delicious and nutritious upgrade.
Freezing and Storage
– Storage: Keep leftover Cheesy Garlic Butter Bombs in an airtight container in the refrigerator. They should stay fresh for about 2-3 days.
– Freezing: You can freeze these bombs before or after baking. If freezing before, prepare them up to the point of baking, then freeze them on the baking sheet before transferring to an airtight container. They can last in the freezer for up to 3 months.
Special Equipment
While making Cheesy Garlic Butter Bombs doesn’t require much, having the right tools can make the process smoother:
– Baking Sheet: Use a sturdy baking sheet lined with parchment paper for easy cleanup.
– Mixing Bowls: A couple of mixing bowls will help with preparing your ingredients and mixtures.
– Measuring Cups and Spoons: Accurate measurements ensure the perfect blend of flavors.
– Biscuit Cutter (Optional): If you prefer uniform biscuit shapes, a biscuit cutter can be handy when preparing the dough.
Frequently Asked Questions
Can I prepare Cheesy Garlic Butter Bombs in advance?
Yes! You can prepare them up to a day ahead, store them in the refrigerator, and bake them just before serving.
Are there any gluten-free options for this recipe?
Absolutely! You can use gluten-free biscuit dough available at most grocery stores.
Can I bake these using an air fryer?
Yes, you can adapt this recipe for an air fryer. Just adjust the temperature to around 320°F (160°C) and reduce the cooking time to about 10-12 minutes.
What if I don’t have biscuit dough?
You can use crescent roll dough or homemade biscuit dough if you prefer a fresher option.
How can I enhance the cheese flavor?
Incorporate a stronger cheese such as feta or gouda into your cheese mixture for increased flavor depth.
Conclusion
Cheesy Garlic Butter Bombs are more than just a treat; they are an experience. With their savory flavors and gooey centers, they are sure to impress everyone around. Their simplicity in preparation makes them a go-to for gatherings and casual snacking alike. Whether you stick to the classic recipe or explore variations, you’re in for a delight every time you take a bite!
Cheesy Garlic Butter Bombs: An Incredible Ultimate Recipe

- Prep Time: 15 minutes
- Cook Time: 15-20 minutes
- Total Time: 3 minute
Ingredients
– 1 can refrigerated biscuit dough (8 biscuits)
– ½ cup shredded mozzarella cheese
– ½ cup cheddar cheese, shredded
– ¼ cup unsalted butter, melted
– 3 garlic cloves, minced
– 1 teaspoon dried parsley (or fresh if preferred)
– ½ teaspoon salt
– ½ teaspoon black pepper
Instructions
Creating Cheesy Garlic Butter Bombs is a breeze if you follow these simple steps:
1. Preheat Oven: Preheat your oven to 375°F (190°C). This ensures the biscuits cook evenly.
2. Prepare Baking Sheet: Line a baking sheet with parchment paper for easier cleanup.
3. Mix Cheeses: In a bowl, combine the mozzarella and cheddar cheese. Set aside.
4. Prepare Biscuits: Open the can of biscuit dough and separate the biscuits.
5. Fill Biscuits: Flatten each biscuit slightly in your hand. Place a spoonful of the cheese mixture in the center.
6. Seal the Biscuits: Fold the biscuit over the cheese and pinch the edges together to seal it. Ensure no cheese is visible from the outside.
7. Prepare Garlic Butter: In a separate bowl, mix the melted butter, minced garlic, parsley, salt, and black pepper.
8. Coat the Bombs: Dip each sealed biscuit into the garlic butter mixture, ensuring it’s well-coated.
9. Arrange on Baking Sheet: Place the coated biscuit bombs on the prepped baking sheet, spaced apart for even baking.
10. Add More Garlic Butter: Drizzle any remaining garlic butter over the top of the biscuits for extra flavor.
11. Bake: Place in the preheated oven and bake for 15-20 minutes or until golden brown.
12. Cool Slightly: Once out of the oven, let them cool for a few minutes before serving.
These steps guide you through crafting these delightful bites easily, making them perfect for any occasion.
Nutrition
- Serving Size: 8 bites
- Calories: 200 kcal (per bomb)
- Fat: 10g
- Protein: 5g


